Home/Dummy Parent/Dummy Title
Keter Manor Outdoor Apex Double Door Garden Storage Shed (6 x 8ft)
A durable and stylish beige and brown garden storage shed perfect for storing garden tools, equipment, bikes, and outdoor essentials. Weather-resistant, low maintenance, and ideal for any garden or allotment setup.
Seed Trays & Propagation Kits
View Seed Trays
Heated Propagators & Grow Lights
See Grow Lights
Seed Compost for Healthy Seedlings
View Compost
Greenhouse Glass Replacement: A Comprehensive Guide
Introduction
A greenhouse relies on its glazing for effective light transmission, insulation, and protection from the elements. Over time, greenhouse glass may crack, chip, or become damaged, requiring replacement to maintain optimal performance. Whether you’re dealing with storm damage, wear and tear, or simply upgrading to better materials, replacing greenhouse glass is an essential skill for any gardener. This guide covers everything you need to know about greenhouse glass replacement, from identifying the right type of glass to step-by-step installation and maintenance.
Why Replace Greenhouse Glass?
Replacing damaged or outdated greenhouse glass is crucial for several reasons:
- Restore Light Transmission: Cracked or dirty glass reduces the amount of light reaching your plants.
- Improve Safety: Damaged glass poses a safety hazard to people and plants.
- Enhance Insulation: Properly installed glass helps regulate temperature and reduces energy costs.
- Maintain Aesthetics: Fresh glass panels give your greenhouse a clean and well-maintained appearance.
Allotment and Kitchen Garden Book
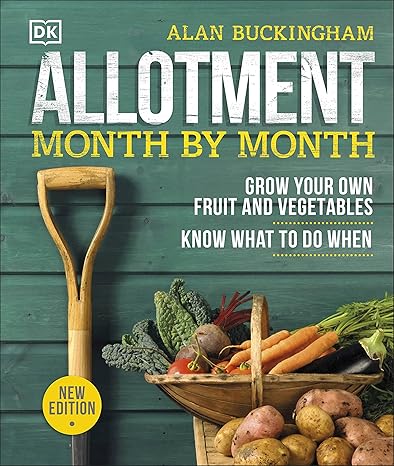
Are you starting an allotment or planning on growing your own fruit, vegetables, herbs, and flowers in a kitchen garden? If so we highly recommend the book Allotment Month By Month. This does exactly what it does on the cover to help you with what you should be doing in the allotment and kitchen garden each month. Below you can see the link for Amazon where you can purchase the book directly. This book is extremely popular with all allotment holders as you will read in the reviews:-
You can check out all the allotment and kitchen garden books we recommend here.
1. Signs You Need to Replace Greenhouse Glass
Not sure if it’s time to replace your greenhouse glass? Look out for these signs:
1. Cracks or Chips:
- Even small cracks can worsen over time, especially during temperature fluctuations.
2. Discoloration or Staining:
- Yellowing or permanent stains can block light and affect plant growth.
3. Loose or Misaligned Panels:
- Panels that no longer fit securely can let in drafts or rainwater.
4. Reduced Insulation:
- If your greenhouse is losing heat, damaged glass could be the culprit.
5. Algae or Mold Growth:
- Severe buildup may require panel replacement instead of cleaning.
2. Types of Replacement Greenhouse Glass
When replacing greenhouse glass, consider these options:
1. Standard Horticultural Glass:
- Affordable and traditional, but prone to shattering.
2. Tempered (Toughened) Glass:
- Safer and more durable, shattering into small, blunt fragments upon impact.
3. Low-Iron Glass:
- Offers superior clarity for maximum light transmission.
4. Double-Glazed Glass:
- Ideal for greenhouses in colder climates due to its excellent insulation properties.
5. Polycarbonate Panels:
- A lightweight, shatterproof alternative to glass, though less aesthetically traditional.
3. How to Measure for Replacement Greenhouse Glass
Accurate measurements are key to ensuring a proper fit:
1. Measure the Frame Opening:
- Use a tape measure to determine the length and width of the opening, noting the exact dimensions.
2. Account for Overlap:
- Add a small allowance (usually 2–3 mm) for the panel to overlap the frame.
3. Check for Consistency:
- Measure at multiple points to ensure the frame isn’t warped.
4. Verify Panel Thickness:
- Standard greenhouse glass is typically 3 mm thick, but confirm compatibility with your frame.
4. Step-by-Step Guide to Replacing Greenhouse Glass
Replacing greenhouse glass requires careful preparation and execution:
Step 1: Gather Materials
- Replacement glass, glazing clips, silicone sealant, gloves, and safety glasses.
Step 2: Remove Damaged Panels
- Carefully remove the broken glass using gloves and dispose of it safely.
Step 3: Clean the Frame
- Remove old putty, sealant, and debris to ensure a clean surface for installation.
Step 4: Fit the Replacement Glass
- Position the new glass panel into the frame, securing it with glazing clips or putty.
Step 5: Seal the Edges
- Apply a weather-resistant sealant around the edges to prevent water ingress and improve insulation.
Step 6: Inspect and Test
- Ensure the panel is secure and test for leaks or drafts after installation.
5. Common Mistakes to Avoid During Glass Replacement
1. Incorrect Measurements:
- Always double-check dimensions before purchasing replacement panels.
2. Rushing the Removal Process:
- Take time to remove damaged glass safely to avoid injury.
3. Using the Wrong Sealant:
- Choose a sealant designed for outdoor use and compatible with glass.
4. Skipping Cleaning:
- Failing to clean the frame can lead to poor adhesion and leaks.
5. Ignoring Panel Orientation:
- Install panels with any coatings (e.g., UV protection) facing outward.
6. Maintaining Replaced Greenhouse Glass
Proper care ensures your replacement panels last as long as possible:
1. Regular Cleaning:
- Use mild soap, water, and a soft cloth to prevent dirt and algae buildup.
2. Inspect for Damage:
- Check panels periodically for cracks, chips, or loose seals.
3. Reapply Sealant:
- Reseal edges every few years to maintain insulation and prevent leaks.
4. Protect from Storms:
- Install storm clips or reinforce panels in areas prone to extreme weather.
Conclusion
Replacing greenhouse glass is a straightforward yet essential task to maintain a safe, efficient, and aesthetically pleasing growing environment. By choosing the right type of glass, taking accurate measurements, and following proper installation techniques, you can restore your greenhouse to optimal condition. Regular maintenance of your new panels will ensure they last for years, providing your plants with the perfect habitat to thrive.
Top 10 Questions and Answers
1. How do I safely remove broken greenhouse glass?
Wear gloves and safety glasses, and carefully remove broken pieces. Dispose of them in a secure container.
2. Can I replace greenhouse glass with polycarbonate?
Yes, polycarbonate is a lightweight, shatterproof alternative to glass.
3. What’s the best glass for greenhouses?
Tempered glass is a safe and durable option, while double-glazed glass is ideal for colder climates.
4. How much does it cost to replace greenhouse glass?
Costs vary depending on the size and type of glass, ranging from £10 to £50 per panel on average.
5. Can I install replacement glass myself?
Yes, with proper tools and precautions, replacing greenhouse glass is a DIY-friendly task.
6. How do I prevent future damage to greenhouse glass?
Reinforce panels with glazing clips, ensure proper sealing, and use protective measures during storms.
7. How often should greenhouse glass be replaced?
Only replace glass when it’s damaged or significantly affecting light transmission and insulation.
8. Can I use recycled glass for replacement?
Yes, as long as it meets the size and safety requirements of your greenhouse frame.
9. What thickness should replacement greenhouse glass be?
Standard greenhouse glass is typically 3 mm thick, but confirm compatibility with your frame.
10. Do I need a professional to replace greenhouse glass?
Not necessarily; with the right tools and safety measures, most gardeners can replace glass themselves.
Gardening With Ben Podcasts
If you love podcasts and are passionate about gardening, why not tune in to Gardening with Ben’s Allotment Podcasts? Packed with tips, inspiration, and plenty of down-to-earth advice, Ben’s podcasts are perfect for anyone looking to get the most out of their garden or allotment.
Whether you’re a seasoned gardener or just starting out, Gardening with Ben covers a wide range of topics to keep you informed and motivated. From seasonal planting guides and pest control tips to creating a wildlife-friendly space, there’s something for everyone. Each episode is filled with Ben’s friendly, relatable charm, making it feel like you’re chatting with a gardening buddy.
Don’t miss out on the latest episode below, where Ben shares his insights on what to plant this month, how to prepare your soil, and creative ways to make the most of the colder seasons. It’s the perfect companion for your next cup of tea or a relaxing moment in your gardening shed.
You can also listen to Gardening with Ben’s podcasts on your favorite platforms, including Spotify, Apple Podcasts, and Amazon Music. Prefer hands-free? Simply ask Alexa, “Play Gardening with Ben,” and you’ll be ready to dig into the latest episode.
So, if you’re looking for gardening inspiration, practical advice, or just a bit of friendly encouragement to get your hands dirty, tune in to Gardening with Ben’s Allotment Podcasts. It’s your perfect gardening companion, wherever you are! ??